Difference between revisions of "H'aanit Single Story"
| Line 1: | Line 1: | ||
Transposed from [https://drive.google.com/file/d/1rAopN7ZrQXQC0X60xdQ2_iA_EQsTjFgR/view DaliaAsTrue's original notes]. | Transposed from [https://drive.google.com/file/d/1rAopN7ZrQXQC0X60xdQ2_iA_EQsTjFgR/view DaliaAsTrue's original notes]. | ||
= S'warkii = | = H'aanit Chapter 1 = | ||
=== S'warkii === | |||
Sell 2x Olive of Life (+ $100). | Sell 2x Olive of Life (+ $100). | ||
| Line 9: | Line 11: | ||
Walk left and interact with the Headman. | Walk left and interact with the Headman. | ||
=== Provoke: Fledgling Hunters === | ==== Provoke: Fledgling Hunters ==== | ||
{| class="wikitable" | {| class="wikitable" | ||
| Line 25: | Line 27: | ||
Head west to Path to the Whisperwood. | Head west to Path to the Whisperwood. | ||
= Path to the Whisperwood = | === Path to the Whisperwood === | ||
Run through the area. Break any enemies you run into, and flee the encounter. | Run through the area. Break any enemies you run into, and flee the encounter. | ||
| Line 40: | Line 42: | ||
''{Encounter table needed}'' | ''{Encounter table needed}'' | ||
= The Whisperwood = | === The Whisperwood === | ||
Head north towards Ghisarma. | Head north towards Ghisarma. | ||
| Line 58: | Line 60: | ||
Heal before Ghisarma if you were surprised by your last encounter. | Heal before Ghisarma if you were surprised by your last encounter. | ||
=== Boss: Ghisarma === | ==== Boss: Ghisarma ==== | ||
{| class="wikitable" | {| class="wikitable" | ||
| Line 120: | Line 122: | ||
Skip cutscenes, and head north out of S'warkii. | Skip cutscenes, and head north out of S'warkii. | ||
= North S'warkii Trail = | = Journey to the Shrine of the Sage = | ||
=== North S'warkii Trail === | |||
Skip the cutscene with Kit. | Skip the cutscene with Kit. | ||
| Line 128: | Line 132: | ||
''{Encounter table needed}'' | ''{Encounter table needed}'' | ||
= Western Flamesgrace Wilds = | === Western Flamesgrace Wilds === | ||
Head out northeast. | Head out northeast. | ||
| Line 148: | Line 152: | ||
''{Encounter table needed}'' | ''{Encounter table needed}'' | ||
= Northern Flamesgrace Wilds = | === Northern Flamesgrace Wilds === | ||
Head north at the save monument and exit east. | Head north at the save monument and exit east. | ||
= North Atlasdam Flats = | === North Atlasdam Flats === | ||
Exit northeast (north at the save monument). | Exit northeast (north at the save monument). | ||
= Western Noblecourt Flats = | === Western Noblecourt Flats === | ||
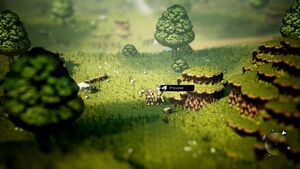
[[File:NoblecourtAwkwardBoy.jpg|thumb|The Awkward Boy in Western Noblecourt Flats.]] | [[File:NoblecourtAwkwardBoy.jpg|thumb|The Awkward Boy in Western Noblecourt Flats.]] | ||
| Line 166: | Line 170: | ||
Head southeast around the hill and enter the Shrine of the Sage. | Head southeast around the hill and enter the Shrine of the Sage. | ||
= Shrine of the Sage = | === Shrine of the Sage === | ||
Acquire the Scholar job. | Acquire the Scholar job. | ||
| Line 174: | Line 178: | ||
Leave the shrine. | Leave the shrine. | ||
= Western Noblecourt Flats = | = Journey to Stonegard = | ||
=== Western Noblecourt Flats === | |||
[[File:WesternNoblecourtFlatsChestLightSoulstoneM.jpg|thumb|The chest containing the Light Soulstone (M).]] | [[File:WesternNoblecourtFlatsChestLightSoulstoneM.jpg|thumb|The chest containing the Light Soulstone (M) in Western Noblecourt Flats.]] | ||
Head northwest and provoke the Awkward Boy, and flee once again. | Head northwest and provoke the Awkward Boy, and flee once again. | ||
| Line 184: | Line 190: | ||
Head north and open the chest to retrieve a '''Light Soulstone (M)'''. | Head north and open the chest to retrieve a '''Light Soulstone (M)'''. | ||
Fast travel immediately to Noblecourt, and leave again. | |||
Head south and provoke the Awkward Boy, and flee for the last time. | Head south and provoke the Awkward Boy, and flee for the last time. | ||
| Line 190: | Line 196: | ||
Exit south. | Exit south. | ||
= North Atlasdam Flats = | === North Atlasdam Flats === | ||
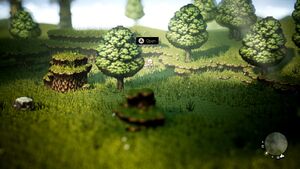
[[File:WhistleWoodPathNorthAtlasdamFlats.jpg|thumb|Hidden path to the Whistlewood.]] | [[File:WhistleWoodPathNorthAtlasdamFlats.jpg|thumb|Hidden path to the Whistlewood.]] | ||
| Line 196: | Line 202: | ||
Head south a bit, then head east at a hidden path to the Whistlewood and enter. | Head south a bit, then head east at a hidden path to the Whistlewood and enter. | ||
= The Whistlewood = | === The Whistlewood === | ||
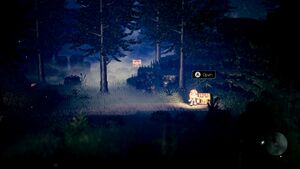
[[File:TheWhistlewood1500Chest.jpg|thumb|The chest containing $1,500 in the Whistlewood.]] | [[File:TheWhistlewood1500Chest.jpg|thumb|The chest containing $1,500 in the Whistlewood.]] | ||
| Line 208: | Line 214: | ||
Exit the forest. | Exit the forest. | ||
= North Atlasdam Flats = | === North Atlasdam Flats === | ||
Exit south. | Exit south. | ||
= East Atlasdam Flats = | === East Atlasdam Flats === | ||
Head west at the save monument and enter Atlasdam, then leave immediately. We will warp back here later. | Head west at the save monument and enter Atlasdam, then leave immediately. We will warp back here later. | ||
| Line 218: | Line 224: | ||
Exit south. | Exit south. | ||
= North Rippletide Coast = | === North Rippletide Coast === | ||
Exit southeast. | Exit southeast. | ||
= East Rippletide Coast = | === East Rippletide Coast === | ||
Head south, then west at the save monument to tag Rippletide, then leave immediately. | Head south, then west at the save monument to tag Rippletide, then leave immediately. | ||
| Line 228: | Line 234: | ||
Continue south over the bridge and exit. | Continue south over the bridge and exit. | ||
= North Cobbleston Gap = | === North Cobbleston Gap === | ||
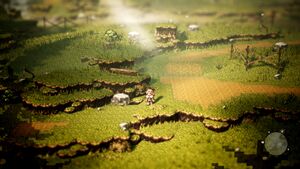
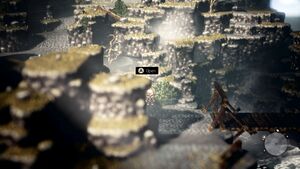
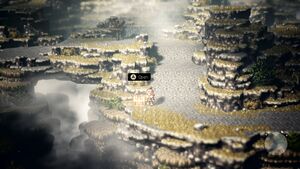
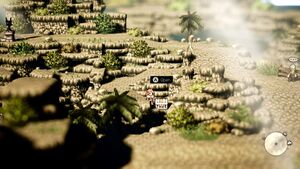
[[File:NorthCobblestonGapChestLightSoulstone.jpg|thumb|The chest containing the Light Soulstone in North Cobbleston Gap.]] | |||
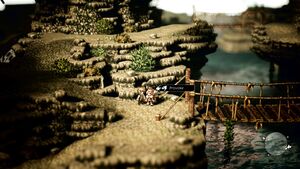
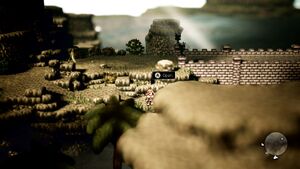
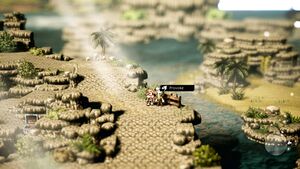
[[File:NorthCobblestonGapChest1200.jpg|thumb|The chest containing $1,200 in North Cobbleston Gap.]] | |||
Grab the Light Soulstone in the chest after the bridge. | |||
Continue east and grab the chest containing $1,200. | |||
Continue east at the fork, and exit south. | |||
=== North Stonegard Pass === | |||
Head southeast towards Stonegard (east past the save monument). | |||
Tag Stonegard and start H'aanit's second chapter, then leave the town. | |||
Return to the save monument and head north, then exit. | |||
= Journey through the Coastlands = | |||
=== Moonstruck Coast === | |||
Head north to the save monument. | |||
Save and return to the titlescreen, and continue your save. Doing this resets your encounter step count. | |||
Head west and enter Shrine of the Trader. | |||
=== Shrine of the Trader === | |||
Obtain the Merchant job, and exit. | |||
=== Moonstruck Coast === | |||
Head back east, then exit north. | |||
=== West Goldshore Coast === | |||
[[File:WestGoldshoreCoastKnowledgeableTraveler.jpg|thumb|The Knowledgeable Traveler in West Goldshore Coast.]] | |||
Head north and west over the bridge by the save monument. | |||
Provoke the Knowledgeable Traveler and flee. | |||
Head over the bridge to the northeast. | |||
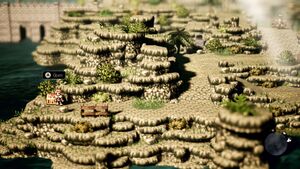
Grab the chest containing a '''Thunder Soulstone (M)'''. | |||
Exit east. | |||
[[File:WestGoldshoreCoastChestThunderSoulstoneM.jpg|thumb|The chest containing the Light Soulstone (M) in West Goldshore Coast.]] | |||
=== West Grandport Coast === | |||
[[File:WestGrandportCoastChestWindSoulstoneL.jpg|thumb|The chest containing the Wind Soulstone (L) in West Grandport Coast.]] | |||
Head west from the Best-selling Author and grab the chest containing the '''Wind Soulstone (L)'''. | |||
[[File:WestGrandportCoastBestSellingAuthor.jpg|thumb|The Best-selling Author in West Grandport Coast.]] | |||
Provoke the Best-selling Author and flee. | |||
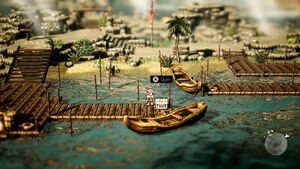
[[File:WestGoldshoreCoastChest20000.jpg|thumb|The chest containing $20,000 in West Grandport Coast.]] | |||
Head south then west to obtain the chest containing '''$20,000'''. | |||
Head east to the save monument. | |||
Save and return to the titlescreen, and continue your save. | |||
[[File:WestGrandportCoastChestThunderSoulstoneL.jpg|thumb|The chest containing a Thunder Soulstone (L) in West Grandport Coast.]] | |||
Head south on the docks and grab the chest containing a '''Thunder Soulstone (L)'''. | |||
Head north and enter the cave. | |||
=== Loch of the Lost King === | |||
[[File:LochOfTheLostKingChestWindSoulstoneL.png|thumb|The chest containing a Wind Soulstone (L) in Loch of the Lost King.]] | |||
Proceed east and grab the chest containing a '''Wind Soulstone (L)'''. | |||
[[File:LochOfTheLostKingChest30000.png|thumb|The chest containing $30,000 in Loch of the Lost King.]] | |||
Head north over the bridge and grab the chest containing $30,000. | |||
Fast travel to Atlasdam. | |||
Revision as of 04:40, 24 January 2019
Transposed from DaliaAsTrue's original notes.
H'aanit Chapter 1
S'warkii
Sell 2x Olive of Life (+ $100).
Purchase Wolf's Bow (- $2,600) and equip immediately.
Walk left and interact with the Headman.
Provoke: Fledgling Hunters
| Enemy | HP | SP | Weaknesses | Leaves | EXP | JP | Item |
|---|---|---|---|---|---|---|---|
| Fledgling Hunter | ??? | 1 | $20 | 3 | 2 | Healing Grape | |
| Fledgling Hunter | ??? | 1 | $20 | 3 | 2 | Herb of Light |
- Hit twice with Linde.
- If Linde uses Sweep on turn 1, then boost her for turn 2.
Head west to Path to the Whisperwood.
Path to the Whisperwood
Run through the area. Break any enemies you run into, and flee the encounter.
| Enemy | HP | SP | Weaknesses | Leaves | EXP | JP | Item |
|---|---|---|---|---|---|---|---|
| Marmot | 369 | 1 | $20 | 5 | 4 | Essence of Pomegranate | |
| Mossy Meep | 418 | 1 | $33 | 6 | 5 | Essence of Pomegranate |
{Encounter table needed}
The Whisperwood
Head north towards Ghisarma.
Fight one Forest Fox for JP, if possible.
| Enemy | HP | SP | Weaknesses | Leaves | EXP | JP | Item |
|---|---|---|---|---|---|---|---|
| Forest Fox | 319 | 1 | $30 | 6 | 6 |
{Encounter table needed}
Heal before Ghisarma if you were surprised by your last encounter.
Boss: Ghisarma
| Enemy | HP | SP | Weaknesses | Leaves | EXP | JP | Item |
|---|---|---|---|---|---|---|---|
| Ghisarma | ??? | 5 | $1,000 | 20 | 15 | Healing Grape Bunch |
Strategy 1
| Turn | H'aanit |
|---|---|
| Turn 1 | Rain of Arrows x 3 |
| Turn 2 | Bow |
| Turn 3 | Bow (Break) |
| Turn 4 | True Strike (Boost x 4) |
| Turn 5 | Inspiriting Plum |
Strategy 2
| Turn | H'aanit |
|---|---|
| Turn 1 | Rain of Arrows x 4 |
| Turn 2 | Bow (Break) |
| Turn 3 | True Strike (Boost x 4) |
| Turn 4 | Inspiriting Plum |
Strategy 3
| Turn | H'aanit |
|---|---|
| Turn 1 | Rain of Arrows x 5 (Break) |
| Turn 2 | True Strike (Boost x 3) |
| Turn 3 | Inspiriting Plum |
- Once Ghisarma prepares to counter your attacks, use Beast Lore to wear down it's guard. Use a Forest Fox first, and then Linde for the rest.
- If Ghisarma is at 3 Shield Points, use Rain of Arrows (Rain of Arrows will always strike at least 3 times).
- Ghisarma should die after 3 max boosted True Strike attacks performed while he's in break.
- Heal as needed.
Skip cutscenes, and head north out of S'warkii.
Journey to the Shrine of the Sage
North S'warkii Trail
Skip the cutscene with Kit.
Head out east.
{Encounter table needed}
Western Flamesgrace Wilds
Head out northeast.
If you encounter Snow Foxes here, kill one for JP. Break and flee the rest.
If you encounter more than one enemy in a fight, attempt to flee immediately.
| Enemy | HP | SP | Weaknesses | Leaves | EXP | JP | Item |
|---|---|---|---|---|---|---|---|
| Snow Fox | 329 | 1 | $36 | 5 | 6 | Essence of Pomegranate | |
| Ice Lizardman II | 418 | 2 | $40 | 5 | 4 | Essence of Plum |
{Encounter table needed}
Northern Flamesgrace Wilds
Head north at the save monument and exit east.
North Atlasdam Flats
Exit northeast (north at the save monument).
Western Noblecourt Flats
Head east at the tree and provoke the Awkward Boy, then flee immediately.
Note: initiating any battle will reset your encounter step count, and fleeing is guaranteed during Provoke.
Head southeast around the hill and enter the Shrine of the Sage.
Shrine of the Sage
Acquire the Scholar job.
If you have at least 30 JP, equip the Scholar job on H'aanit now and learn Lightning Blast.
Leave the shrine.
Journey to Stonegard
Western Noblecourt Flats
Head northwest and provoke the Awkward Boy, and flee once again.
Head northeast into Noblecourt, and exit immediately.
Head north and open the chest to retrieve a Light Soulstone (M).
Fast travel immediately to Noblecourt, and leave again.
Head south and provoke the Awkward Boy, and flee for the last time.
Exit south.
North Atlasdam Flats
Head south a bit, then head east at a hidden path to the Whistlewood and enter.
The Whistlewood
Head north to retrieve a chest containing $1,500.
You need to kill one encounter here to get 100 JP. Any encounter besides 4 frogs will work. Kill them all at once with the Light Soulstone (M).
Learn the Fire Storm skill. Doing this will earn you the Evasive Maneuvers support skill. Equip it immediately.
Exit the forest.
North Atlasdam Flats
Exit south.
East Atlasdam Flats
Head west at the save monument and enter Atlasdam, then leave immediately. We will warp back here later.
Exit south.
North Rippletide Coast
Exit southeast.
East Rippletide Coast
Head south, then west at the save monument to tag Rippletide, then leave immediately.
Continue south over the bridge and exit.
North Cobbleston Gap
Grab the Light Soulstone in the chest after the bridge.
Continue east and grab the chest containing $1,200.
Continue east at the fork, and exit south.
North Stonegard Pass
Head southeast towards Stonegard (east past the save monument).
Tag Stonegard and start H'aanit's second chapter, then leave the town.
Return to the save monument and head north, then exit.
Journey through the Coastlands
Moonstruck Coast
Head north to the save monument.
Save and return to the titlescreen, and continue your save. Doing this resets your encounter step count.
Head west and enter Shrine of the Trader.
Shrine of the Trader
Obtain the Merchant job, and exit.
Moonstruck Coast
Head back east, then exit north.
West Goldshore Coast
Head north and west over the bridge by the save monument.
Provoke the Knowledgeable Traveler and flee.
Head over the bridge to the northeast.
Grab the chest containing a Thunder Soulstone (M).
Exit east.
West Grandport Coast
Head west from the Best-selling Author and grab the chest containing the Wind Soulstone (L).
Provoke the Best-selling Author and flee.
Head south then west to obtain the chest containing $20,000.
Head east to the save monument.
Save and return to the titlescreen, and continue your save.
Head south on the docks and grab the chest containing a Thunder Soulstone (L).
Head north and enter the cave.
Loch of the Lost King
Proceed east and grab the chest containing a Wind Soulstone (L).
Head north over the bridge and grab the chest containing $30,000.
Fast travel to Atlasdam.
